How to Cross Stitch
Overview
Teaching: 30 min
Exercises: 0 minQuestions
How to start stitching?
How do we make the cross stitch?
How can we make our stitching look neat?
Objectives
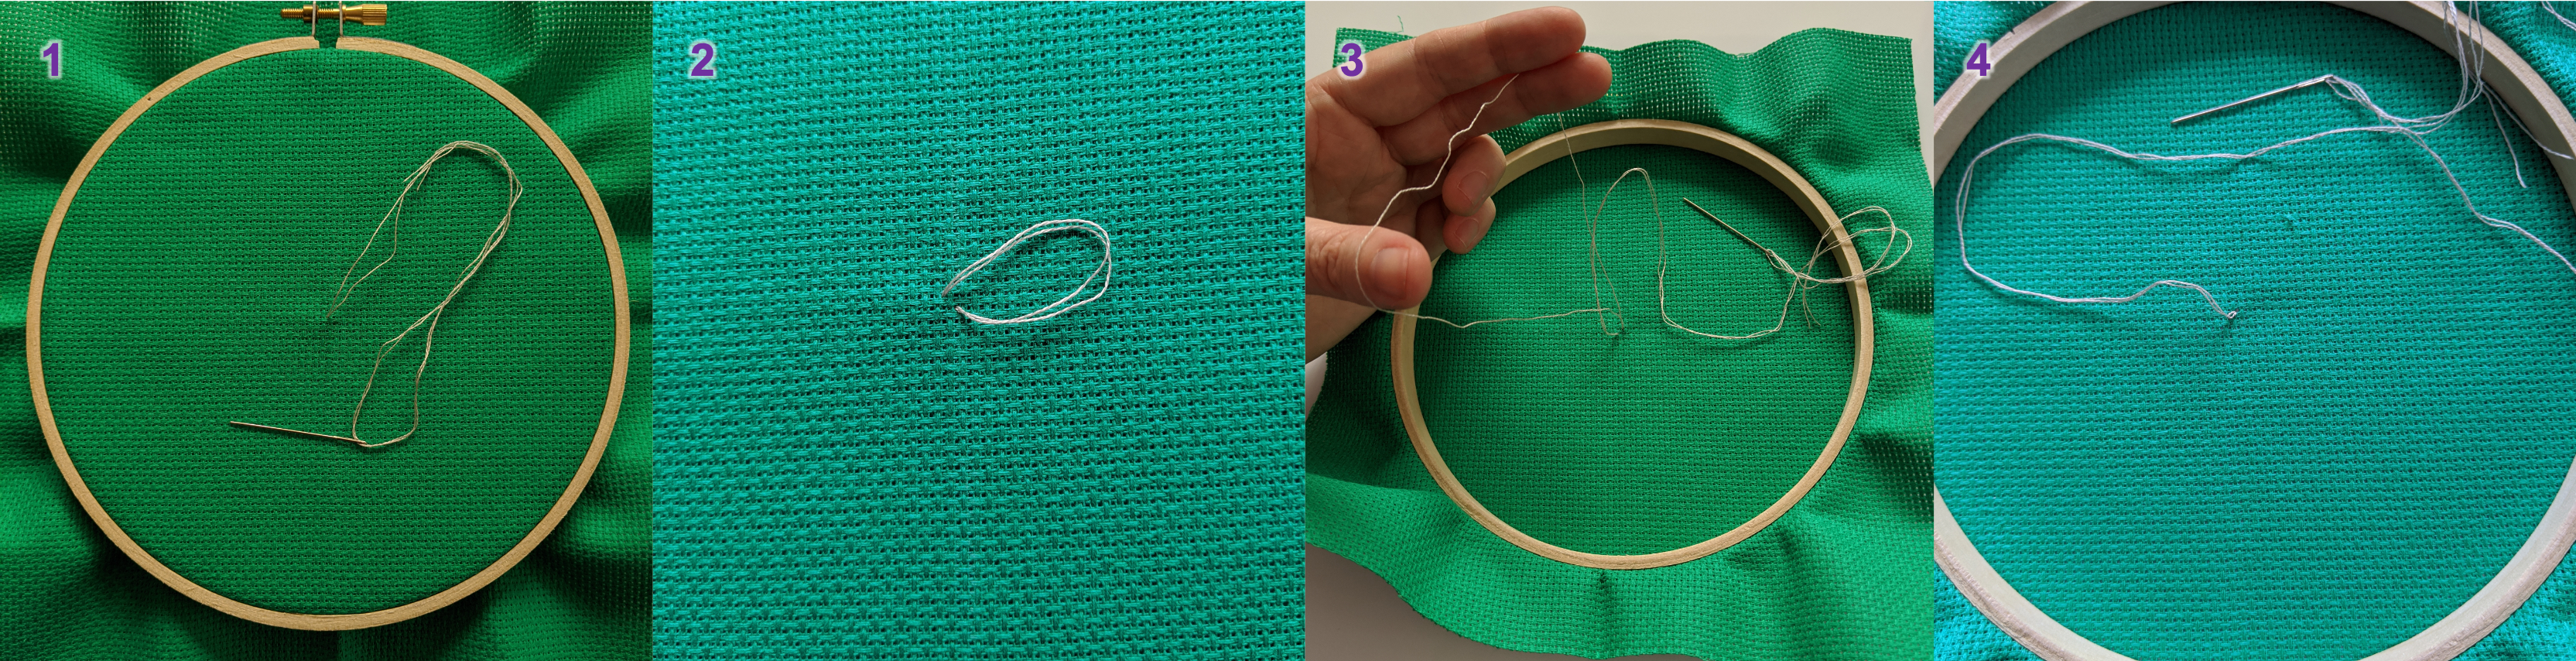
Introduction to the loop start method
How to make a cross stitch
Stitching best practices
How to Cross Stitch
Now it’s time to cross stitch!
To make the first stitch, push your needle from the underside of the fabric through what will be the top left corner of your stitch.
Be careful not to pull all the thread through!
Now push your needle through the hole 1 space to the right and 1 space down from where we came up.
This will create the first diagonal \ part of the cross stitch.
Now on the back of your fabric, pass the needle through the looped end of your thread and pull it taut.
This should make an anchor preventing your thread from pulling through the fabric.
This method is known as a “loop start”.
 |
|---|
| Figure 1: How to anchor your first stitch with a loop start. |
From the underside of the fabric, pass the needle through the hole one space above where you last came through the fabric. Back on the front you fabric, pull the needle through the hole one space down and to the left of where you just came up.
This should have created your first cross (X) stitch!
Stitching Best Practices
When cross stitching, there’s a couple of best practice tips that will help make your work look super neat. Ultimately you can stitch however works best for you, just bear these tips in mind when thinking about your workflow.
1) Always make sure your crosses go the same way.
So if you make your crosses by going left-to-right (\) first, then right-to-left (/) on top, make sure all your crosses do this. It will give a uniformity to your stitching.
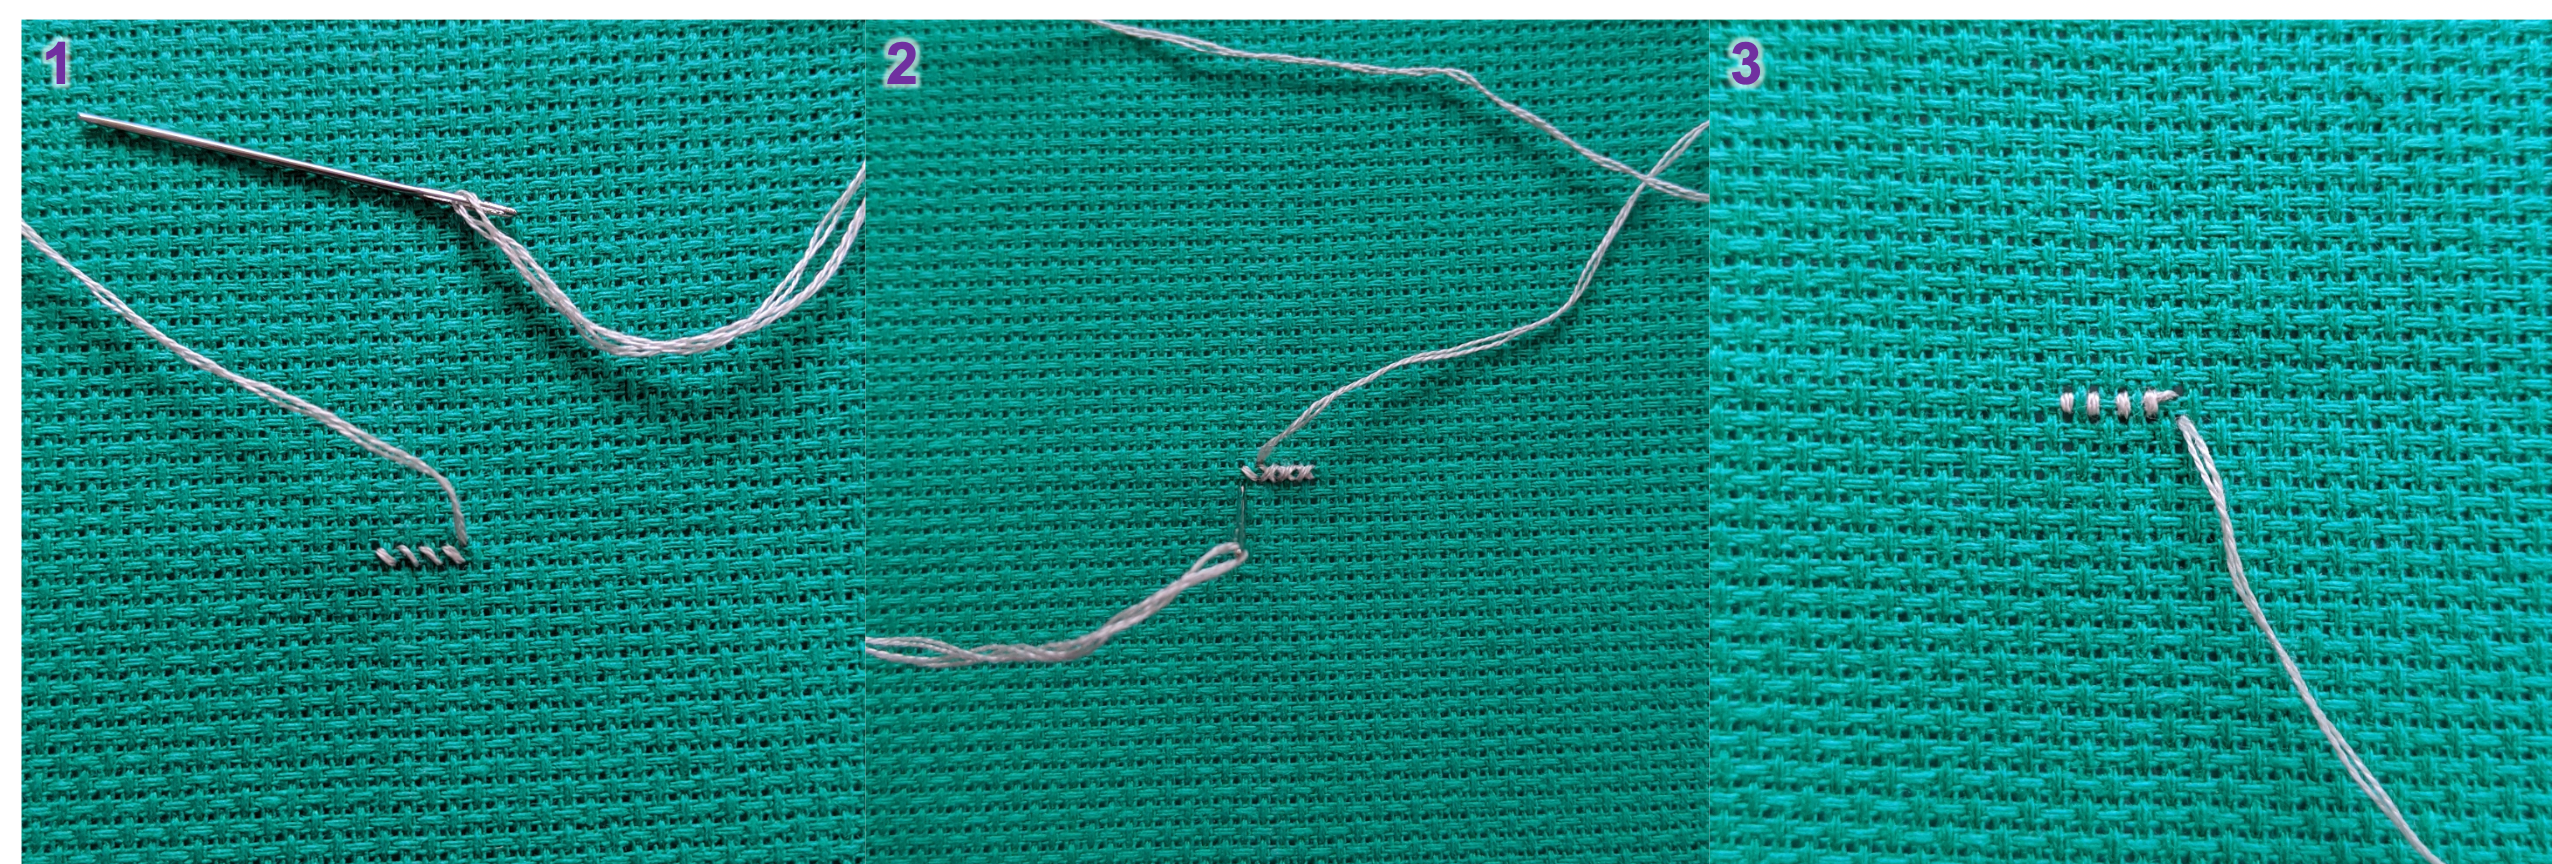
2) Do a row of half stitches then come back along the line to finish off the cross.
It can save a lot of time and be a more efficient way to stitch if you work along a line with half stitches first (for example, \), then come back down the line to finish off the crosses (so, /// followed by \\\).
This again helps neaten your work up but also means there’s less thread to unpick if you make a mistake.
 |
|---|
| Figure 2: A method of stitching that makes your stitches look uniform. |
Further Reading
Key Points
The loop start method
Making a cross stitch
Stitching best practices